
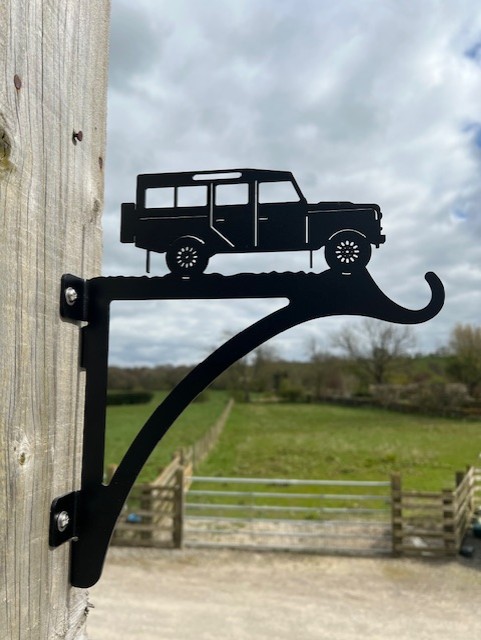
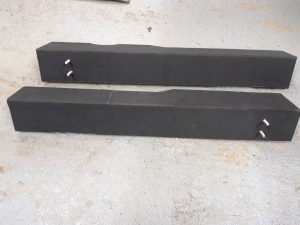
Parts used
Hanging Basket, 110 Defender
|
YRM Ref |
YRM 476-110 |
|
JLR/OEM Ref |
|
|
Description |
Hanging Basket, 110 Defender |
|
Fits |
Timber, brick & stone |
|
Thickness/Material |
3mm Mild Steel |
|
Finish |
Been shot balasted then primed, finished with a black textured powder coat |
|
Extra Information |
Can be used for hanging plants, bird feeders & even your overalls JLR/OEM numbers used for reference only |
|
Fixings Included |
4no A2 Pozi Pan 4.5 x 35 4no Brown wall plugs |
|
Workshop |
|
Excl. VAT £24.95
Incl. VAT £29.94

| 1no. | 175 | HDG Front Seat Belt Mount Bracket with Fixings – LR Defender 2/3 Door |
| 1no. | 122 | Front of Rear Tub Repair – LR Defender 2 or 3 Door |
| 1no. | 1903 | 100mm x 1mm x 10m Single Sided Foam Tape |
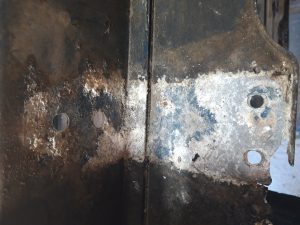
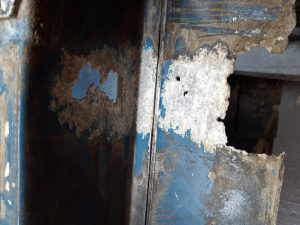
Corrosion around the front of the rear tub and its seat belt mountings could have disastrous consequences in an accident. Steve Miller explains the fix.
Corrosion really can take hold of our Land Rover’s body parts, especially after a few year’s hard graft. After replacing the rear body tub’s floor structure last month, I now need to address the rest of my Ninety’s rear tub issues, especially around the safety-critical seatbelt mounting areas. Repairing these will ensure its structural integrity and offer safer motoring for many more years to come.
The main issue is where any steel parts come directly into contact with aluminium. On a rear tub such as this, more concerning area is around the seatbelt anchor points. Originally, a piece of angled steel is bolted to the underside of the tub with captive bolts coming up through the aluminium tub so the inertia seatbelt reels can be fitted. Again, the seatbelt stalks are also bolted from the cab and into much larger angled steel plates on the underside.
Over time, the two dissimilar metals react with one another. In the worst case, and in the event of an accident, the additional strain on the seatbelt could cause the entire seatbelt reel to pull through the floor.
In order to carry out these repairs with the rear tub fitted to the vehicle, you would need to remove the seatbox from the vehicle to gain access. With the extensive repairs needed on this particular truck, it has been made all the easier having all parts, including the rear tub removed.
Safety note
Gloves were worn throughout the cutting, drilling and fitting to protect from swarf, sharp edges and tool slips. They are not seen in the pictures due to working alone (socially distanced) and continually setting up the camera and timer for the illustrations. Always wear thick gloves when working with metal.
Steps
1 |
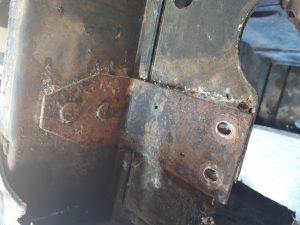
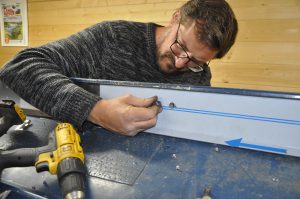
I spy corrosion
Looking from the underside, these brackets fix through the floor to the seatbelt inertias. Once you’ve unbolted the inertias, these will fall off. |
 |
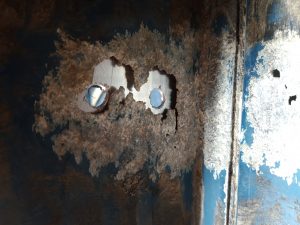
2 |
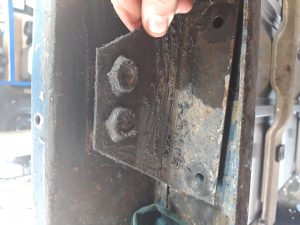
Safety-critical and very weak
Although this looks fairly bad, I have seen a lot worse. Thank goodness parts are available to add in extra strength, especially around the seatbelt anchorage. |
 |
3 |
Another bit for the scrap pile
This bracket will also need unbolting as it’s no longer needed. This captive plate is what holds the seatbelts stalks in place. It’s also bolted to the upstand. |
 |
4 |
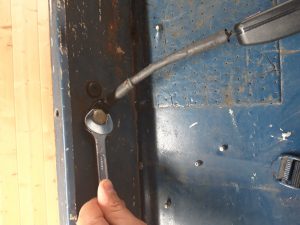
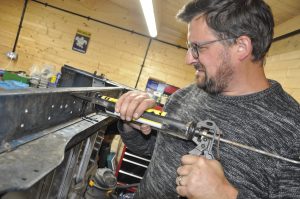
Only spanner work
The heads of these bolts may have a plastic cover on them which needs removing to reveal the head. Keep these safe, you’ll need them later on. |
 |
5 |
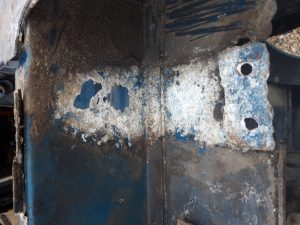
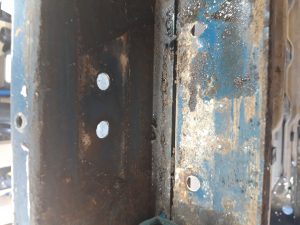
What’s lurking behind?
Due to the amount of oil built up from a leaking transmission, the metalwork has stood up very well, with no obvious signs of furry aluminium. |
 |
6 |
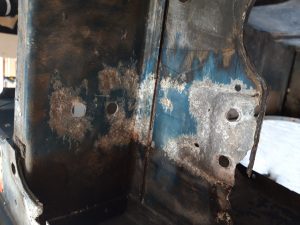
Nothing to see here
It’s not uncommon to see this area totally rotted through but, in this case, all is well. There is a benefit from oil leaks, sometimes! |
 |
7 |
Time for a clean up
Whilst most of the corrosion was still attached to the steel brackets, a quick wire brush-up cleans the area ready for the new parts. |
 |
8 |
Nice and Shiny
Part number 175WF is the two replacement repair panels which are supplied in galvanised steel. These will literally last for years. |
|
9 |
Into position
There panels are perfectly made and, at first, seemed a tight fit until I learnt the knack of getting them in and out. Temporarily fitted in position here. |
 |
10 |
Aligned for seatbelt stalks
The new galvanised sections come with the captive nuts already in place. The trick is to line them up with the holes already in the rear tub. |
 |
11 |
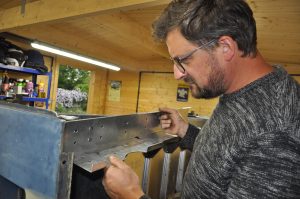
A story of two halves
Part 122 is the aluminium panels which locate behind the seats. They’re supplied in two halves as it’s impossible to fit as one. Again, fitted temporarily for now. |
 |
12 |
Alignment Issues
Using the pre-existing holes as a datum (two at the top), I mark on the back of part 122 with a marker pen before drilling with an M8 drill bit. |
 |
13 |
Tricks of the trade
With no obvious datum points to work with on the other side due to excessive corrosion, knowing where to match drill into part 122 was a mystery, so… |
 |
14 |
A template in hand
…Fortunately, I could utilise my now drilled example on the right-hand side, and then put this back to back with the one on the left… |
 |
15 |
Like so
…Making sure you have these the correct way around, you can create a mirror opposite, and then mark and drill once again with an M8 drill. |
 |
16 |
Clear location
With part 122 back in place, it’s clearer as to where the holes go, and they’ll line up nicely with the fixed studs on the new galvanised part. |
 |
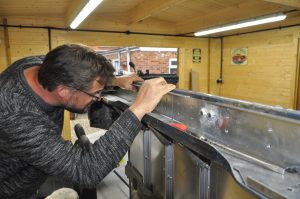
17 |
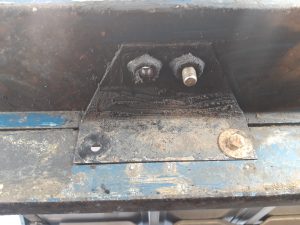
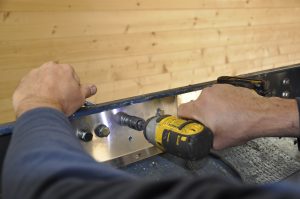
Remember those bolts?
It’s now time to fix the seatbelt stalk bolts through part 122 and into the captive nuts on part 177WF, holding everything in place ready for match drilling. |
 |
18 |
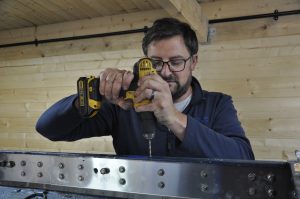
You know the drill
There are around the 24 M8 holes to drill each side if you choose, although you want to ensure you’re only drilling into solid aluminium, not the corroded stuff. |
 |
19 |
Final fit for parts 122
These two panels need a row of 5 mm holes drilling along the angled edge. These can be done either before or after drilling the M8 holes. |
 |
20 |
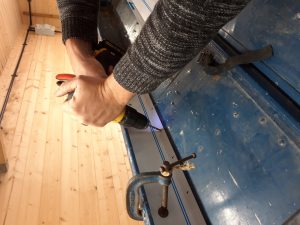
Riveting fun
Pop rivets can then be used along this edge which will ensure they’re fixed for good. Just make sure nothing moves if you’ve already drilled the M8 holes. |
 |
21 |
Prevent future corrosion
I now need to remove the galvanised steel plates one last time. I’m using single-sided foam tape as a barrier between the two dissimilar metals. |
 |
22 |
Completely covered
Ensuring that the steel surface is completely covered, I remove the yellow paper backing to reveal the foam. This will prevent any future corrosion. |
 |
23 |
Final Fix
Using some black waterproof sealant, I run a bead around the edges to prevent future water ingress. I’m ready to offer up the steel sections one last time.
|
 |
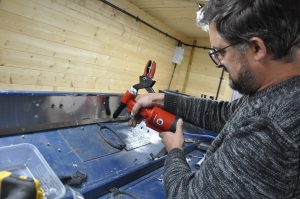
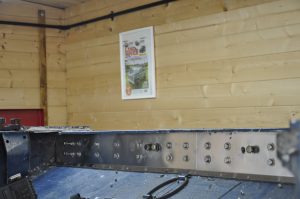
24 |
Bolt action
Having managed to use all 24 M8 bolts each side, a quick nip up with a 13mm spanner and socket sees the job nearing completion. |
 |
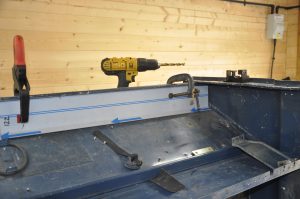
25 |
Last bit of drilling
Using a 6mm drill bit, now there is just the row of holes to match-drill along the edge which bolts to the seatbox.
|
 |
26 |
A job well done
It looks like a lot of bolts, but most will be hidden behind the seats/cubbybox. Good to know it has added strength and additional safety to the Land Rover. |
 |
Working with the tub on the truck
In order to carry out these repairs with the rear tub fitted to the vehicle, you would need to remove the seatbox from the vehicle to gain access. With the extensive repairs needed on this particular truck, it has been made all the easier having all part, including the rear tub removed.
This workshop was carried out by Steve Miller and can be found in September 2020 copy of LRM